This blog post all started with a Christmas gift from, you guessed it! My momma. I have been dying to try this recipe out, but I've been lacking the tool that makes it fun.
A kitchen torch!!
So much fun for such a tiny, dangerous little object! My husband was a little afraid of me when I was using it.
Heh heh heh.
Other than this and creme brulee, I have no idea what you would need a kitchen torch for. But for $10, it's worth the thrill of toasting your homemade marshmallow frosting that tops that delectable chocolate cupcake you just whipped up.
This recipe is from Martha Stewart's website, although this isn't an original recipe of hers. I'm not going to lie, I was intimidated a little bit by this recipe, especially the marshmallow frosting, but I threw up my arms and figured "Why the heck not?!" I am SO glad I did.
Chocolate Graham Cracker Cupcakes
I know, it's a lot of ingredients. I promise it's easy though!
- 2 1/4 cups plus 2 tablespoons sugar
-1 3/4 cups all-purpose flour
-3/4 cup plus 1 tablespoon cocoa powder (NOT Dutch-processed)
-1 1/2 teaspoons baking powder
-1 1/2 teaspoons baking soda
-1 teaspoon salt
-2 large eggs
-1 cup whole milk
-1/2 cup vegetable oil
-2 teaspoons pure vanilla extract
-1 cup boiling water
-1 1/2 cups graham cracker crumbs
-1/3 cup unsalted butter, melted
-9 ounces semi-sweet chocolate morsels (3/4 of the bag)
1. Pre-heat oven to 350 degrees. Line 2 cupcake tins with liners and set aside.
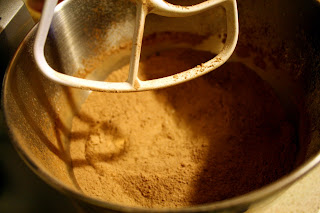
2. Sift 2 cups plus 2 tablespoons sugar (you should still have 1/4 cup of sugar leftover, set aside), flour, cocoa powder, baking powder, baking soda, and salt together in a large bowl. Mix until all ingredients are incorporated.
3. In a separate bowl, mix together eggs, milk, oil, and vanilla. Add flour to mixture and beat on medium speed for 30 seconds. Scrape sides of the bowl and continue beating on medium for an additional 2 minutes. Add boiling water and stir to combine.* Set cake batter aside.
*Before I added the boiling water, my cake batter looked pretty good. It definitely looked like batter and I was so hesitant to add this water. I thought it would be a disgusting, liquid mess. I was wrong! I'm glad I listened to Martha! ;o)
4. Place graham cracker crumbs, 1/4 cup sugar, and melted butter in a large bowl. Stir to combine.
5. Place 1 tablespoon of graham cracker mixture into the bottom of the liners. Using your fingers (or the bottom of a glass, like Martha suggests), gently pack crumbs into liner. You should have some graham cracker mixture left over. Put this to the side to sprinkle on top of cupcake batter.
6. Place 2 teaspoons semi-sweet chocolate in each liner.
Bake until the edges of the graham crackers are a golden brown, about 6 minutes. Remove from oven and fill each liner 3/4-full with chocolate cake batter. Sprinkle leftover chocolate and graham crackers over cake batter.
7. Bake cupcakes for about 17-20 minutes or until toothpick inserted in tops of cupcakes comes out clean. Let cupcakes cool for at least 1/2 hour before topping.
Marshmallow Frosting
-8 large egg whites
-2 cups sugar
-1/2 teaspoon cream of tartar
-2 teaspoons pure vanilla extract
1. Place egg whites, sugar, and cream of tartar in a heatproof bowl (I used my stand mixer's bowl after verifying that it was indeed heatproof!). Set over a saucepan of simmering water. Whisk constantly until sugar is dissolved* and egg whites are warm to the touch, about 3 to 4 minutes.
You can see the sugar still stuck along the edges of the bowl, but this is pretty much what your mixture will look like.
*A great tip I learned to tell if the sugar is dissolved: pick up a little bit of the mixture in between your fingers and rub them together. If it still feels grainy, keep whisking it on the double boiler.*
2. Transfer bowl to electric mixer fitted with whisk attachment and beat starting on low speed. Gradually increase speed to highest until stiff, glossy peaks form, about 5-7 minutes.* Add vanilla and mix until combined.
That peak is a thing of beauty!
*This is another step I was unsure of. The way my egg white mixture looked, I never dreamed it would whip into anything that I could pipe onto a cupcake and consider tasty. Wrong again! I started on the lowest speed and increased my speed one notch just about every minute until I got to 10 right at the 6 minute mark. It was actually pretty cool to watch- I wish I had taken more photos, but I was a little nervous it wasn't going to come out right so I didn't want to walk away!*
From here, I piped the frosting onto the cupcakes with Wilton's 2D tip. This icing piped onto this cupcake SO beautifully. It is somehow very firm when you pipe it, yet incredibly soft when you bite into it. It astounds me!
And now the scary part! The torching! Since I was on my own for this project, I couldn't take photos of the actual torching. BOO! But I assure you it was fun and easy. This icing was MADE to be toasted! lol! So without further ado, I present you, S'Mores Cupcakes!
I could not get over how much these actually tasted like a s'more! Especially the marshmallow frosting considering there was not a SINGLE marshmallow in the whole thing! Bananas!
Thanks for checking us out everyone!


LOOKS AMAZING!!! I LOVE YOUR BLOG ;)
ReplyDelete